cat fur whisker accessories
Jul. 7th, 2024 02:36 pm
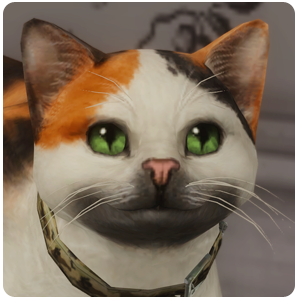
after MUCH trial and error, we FINALLY have 3D cat whiskers that are wearable with collars for ts2! this wouldn't have been possible without kitteninthewindow guiding me the entire time and looking in the packages when they weren't working!!! and because she shared the very easy tutorial with some resources after we got the adults/ elders working, they work for kittens too! these use subtype-bin BxE from kitw's chart in her tutorial, so they are compatible with everything on there.
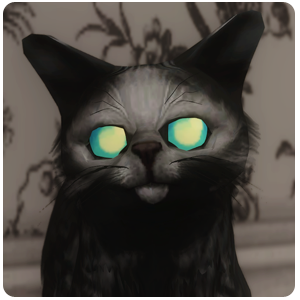
these whiskers are repositoried to the base coat color, so they will be whatever color your cat base coat is. the mesh is from lazyduchess' ts3 edits. jacky93 made a collar version of these whiskers previously, which is where i got the idea. i reconverted ld's whiskers with the brows as well, remapped them to kitw's accfurcards2018 file (included, make sure you keep this file in your DL or the whiskers won't show up!), and here we are! they move with the face (this was our big hurdle after getting everything else working, lol) and can be worn by any cat preset. they will warp slightly on some (the smushy kitties will get slightly messy whiskers) but it isn't too bad from what i've seen! the black cat in the previews uses a smush face preset. these are with the other fur accessories in the top option of tab 4 (i think that's where the fur acc are lol).
kittens will be born with them if their parents had them!
maxis breed default replacements with added whiskers are linked below, so strays can generate with them! these must be placed in the Documents > EA Games > The Sims 2 Ultimate Collection (or whichever version you have) > PetBreeds (NOT the downloads folder) and let them OVERWRITE. Make a backup of this folder first in case you want to remove the whisker accessory. you can open up the package for any custom breed you have and add the whiskers to the AGE DATA as explained below if you want to!
*****if you want to add the whiskers to cats who already exist, kitteninthewindow sent me these instructions for simPE:*****
(my note: make a backup of your neighborhood folder first, in case you make a mistake)
Oh btw, the way to add whiskers to already existing cats and breeds is to open up their Age Data and change 2 things. The first is to add a line that says pbd# (dtstring) = f6a899ba-427e-4328-55c6-7a8bf58bb5e3 (my note: this is the family dstring from the xmol in the packages)
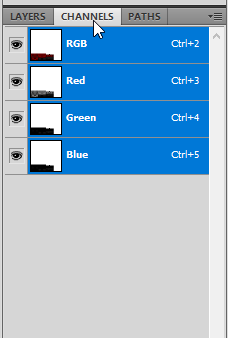
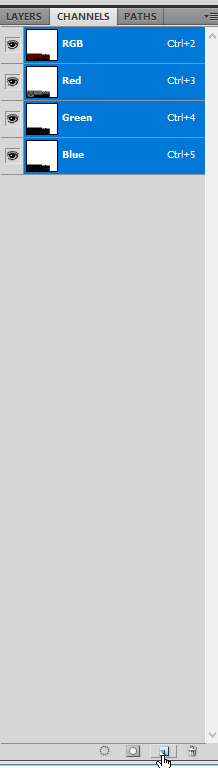
(my note: to get to the aged data, open simpe, then go to the topbar and select tools > neighborhood > neighborhood browser. select your neighborhood and let it load up. then go to tools > neighborhood > sim browser and select the cat you want to add the whiskers to from the list and click open. in the pluginview of the sim description you just opened, click the icon that looks like a blue cabinet with files in it that says "more" and select open character file. in the resource tree on the right you should see Age Data (AGED). click on that and do the following in the plugin view! click commit after changes and make sure to click file > save or ctrl + s at the end)
(my note: to get to the aged data, open simpe, then go to the topbar and select tools > neighborhood > neighborhood browser. select your neighborhood and let it load up. then go to tools > neighborhood > sim browser and select the cat you want to add the whiskers to from the list and click open. in the pluginview of the sim description you just opened, click the icon that looks like a blue cabinet with files in it that says "more" and select open character file. in the resource tree on the right you should see Age Data (AGED). click on that and do the following in the plugin view! click commit after changes and make sure to click file > save or ctrl + s at the end)
The # will be different for each individual cat just depending on how many fur accessories they already have. pbd0 if they have none, but if they already have pbd's listed in the age data just +1 to the highest pbd.
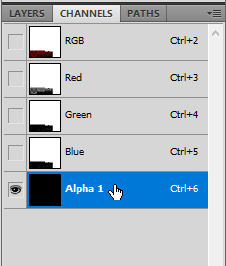
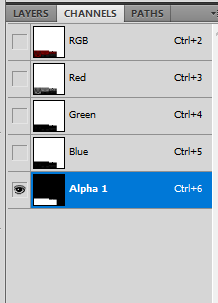
Next, find a line that says numpbd (dtUInteger) and +1 to whatever it already says. This tells the game how many fur accessories the pet or breed is wearing
numpbds and pbds are usually near the bottom of the list, probably around 4th from the bottom, so they should be easy-ish to locate
i will make a video tutorial asap, but i wanted to get these shared! don't be scared of simpe! make backups before editing any files and if you mess something up just replace with your backup.
here's the video tutorial showing how to add the whiskers to custom pet breeds so strays using them will have whiskers, and to already existing pets in your neighborhoods! sorry for the poor sound idk what was going on with the mic, also i dropped something while recording lol. and since i did this on the fly there is a lot of pausing and "ummmmm" haha. here's the string you need to be pasting (same as the written instructions of course): f6a899ba-427e-4328-55c6-7a8bf58bb5e3
the family string for the new white only whiskers for use with the simpe tutorial is dab4deb2-412d-583b-6b0e-44843b72e813
back up your breed files and your neighborhoods before editing!
fyi you can follow the tutorial for existing pets up to the simbrowser part, then just write down the character file names for the cats (they are listed in the simbrowser on the right, something like N001_User00023-- the first 4 will be your neighborhood code), and close out of the neighborhood in simpe. then you can just navigate to your neighborhoods > NHOOD NAME CODE (ex. N001) > characters folder and open the files directly from there. way easier if you have a lot of cats to add whiskers to!
UPDATE 7.19.24: fixed a visual glitch where there was a little floating tuft of fur under the belly. links have been updated and you can just replace the file with the new one. MAKE SURE you delete your accessory and groups cache files as well as the content registry file in your ts2 documents folder so the game recognizes the update! unfortunately if you already had these on a pet and you loaded a lot with the pet, you will probably have to go to a mirror and edit the appearance (i just put a collar on, or take one off if they had one), save the lot, leave it, and reenter it for the pet to update its appearance. i'm not sure if just playing for a while will update it, but this is the way i know to update it.
really sorry i didn't catch it before i shared bc of how sticky pet stuff is!
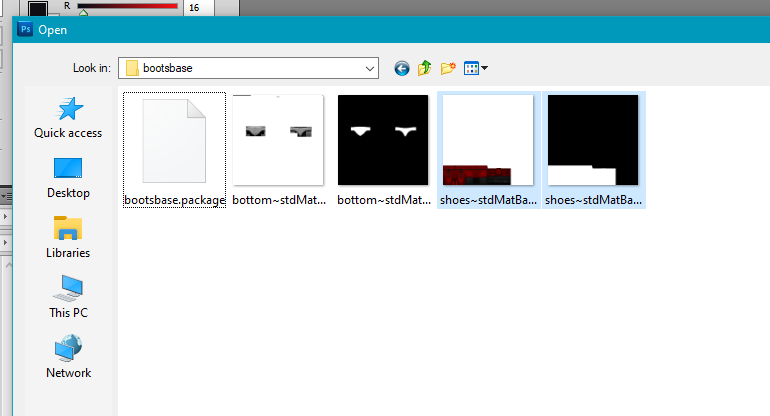
UPDATE 10.31.24: added a white whisker only version for belladovah, who requested it since almost all cats just have white whiskers. it isn't possible to make a non-slaved fur accessory (you have to make a separate recolor for every single coat color), so this one just doesn't pick up any color and defaults to white. technically you can have this and slaved version in your game at the same time, but they can be applied at the same time and idk what kind off visual glitch effects it will have other than the slaved version overwriting the white if you have a kitten born with both sets of whiskers for example, so i suggest choosing one or the other unless you really want both. i added the white whiskers petbreeds default below as well. the family string for the new white only whiskers for use with the simpe tutorial is dab4deb2-412d-583b-6b0e-44843b72e813
IF YOU'RE ALREADY USING THE SLAVED VERSION AND WANT TO SWITCH TO WHITE WHISKERS ONLY: you can just download this edit of the original file HERE and replace it in your dl folder. i just changed the subtype in it to 0 so that it can't pick up slaved color. it works exactly the same as the new white file, only your already made pets should update to white whiskers when the game updates their appearance (can be forced by deleting caches, content registry, and changing appearance in a mirror-- sometimes you have to save and reload the lot too). if you do this, don't download the white petbreed defaults, keep using the slaved defaults!
CREDITS
DOWNLOAD maxis cat breeds default w/ whiskers added (MUST BE PLACED IN PETBREEDS FOLDER): DROPBOX // SFS
DOWNLOAD whisker fur accessory WHITE ONLY: DROPBOX // SFS
DOWNLOAD maxis cat breeds default w/ WHITE ONLY whiskers added (MUST BE PLACED IN PETBREEDS FOLDER): DROPBOX // SFS
